Guest post by Tracy Power Objects Conservation and Lesley Bone
Funding for this project was generously provided by the Francis I. Proctor Foundation for Research in Ophthalmology at UCSF.
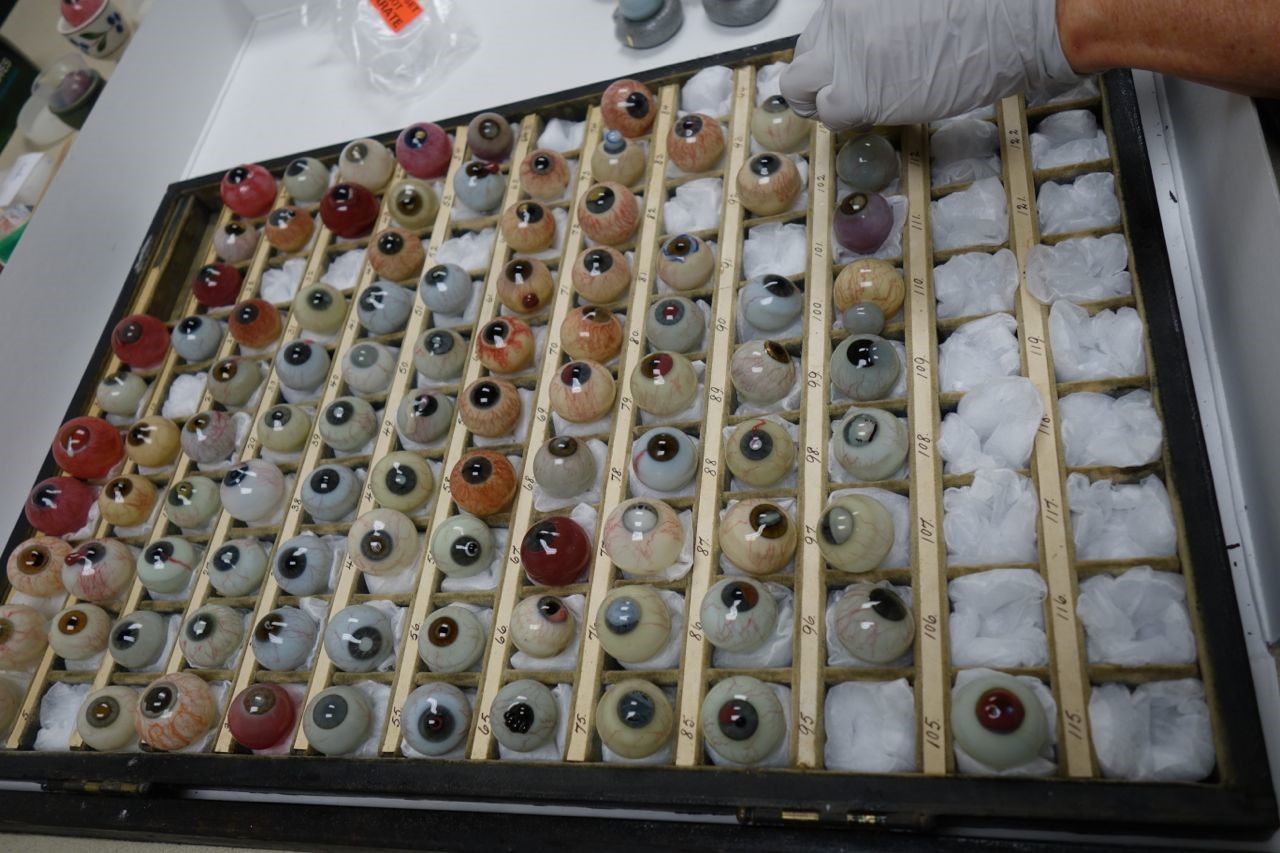
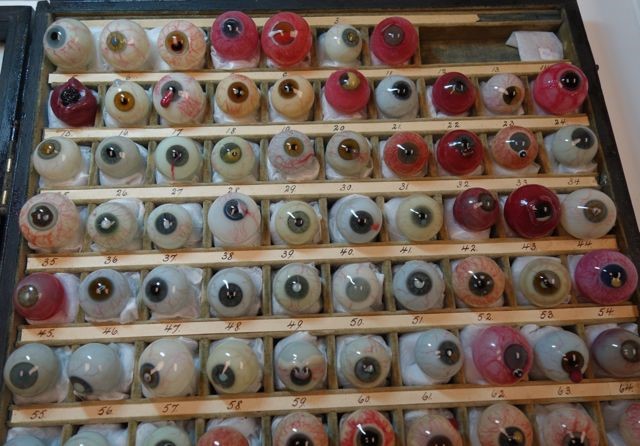
Since 1963, the UCSF Archives & Special Collections holdings have included the historic Danz collection of ocular pathology specimens. The set, one of 13 believed to have been made, was originally intended as a teaching tool for use in medical schools. These blown orbs, some still retaining a long delicate stem, were made in Germany, in the 1880’s, by master glassblower, Amandus Muller. Each glass eyeball depicts, in minute detail, the various diseases and defects that can afflict the eye and is a unique masterpiece of the art of glass making.
In June 2018 the collection was examined by Tracy Power and Lesley Bone to determine the nature and scope of condition problems that these objects. Past treatments and current breakages were evaluated, the deterioration of the glass was examined, and current storage conditions were assessed.
While the majority of the glass eyeballs were in stable condition, there were ironically a couple that were themselves suffering from glass disease. This presents with a sticky surface; as a component of the glass leaches out of the surface due to an instability in the glass mix. These surfaces readily attract dust.
Of the previously repaired items, some were in stable condition, but most were in poor condition due to deterioration of the repair materials used and inferior skills of the person or people doing the repairs. One particularly peculiar repair was filled with bright red dental wax.
The eyeballs were stored in their original compartmented box, with light damaged (faded), velvet-covered cavities for each specimen, and a hinged lid with a glass cover. The box was still serviceable, but the cavities for the eyeballs had wads of old cotton wool, which was not suitable for the collection since the blown balls retained the thin tubular glass extensions that had been snapped from the rod when the ball was blown. These tended to snag on the cotton.
A treatment plan was agreed upon which would include upgrading the storage container, cleaning all of the glass eyeballs, and repairing the broken glass orbs.
Improved Housing
The eyeballs were removed sequentially for cleaning, and at that time the cavities in the display box were cleaned and new, improved supports were made. The old cotton wool was replaced with new storage materials that will not be as likely to snag the glass tips. Small pillows were made of polyester batting in Holytex fabric. The glass pane in the box was cleaned with detergent and water. Several discolored areas of paper on the box were toned with conservation stable watercolors and some lifting edges of paper were glued down.
Cleaning of the glass eyeballs
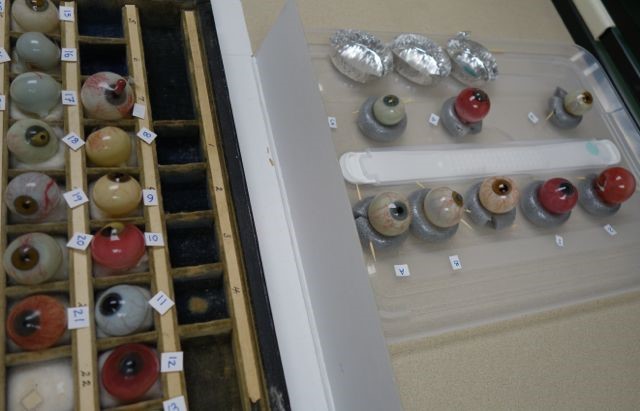
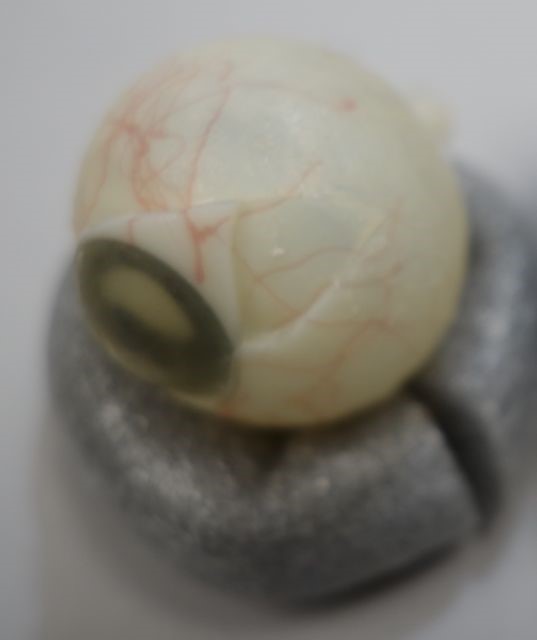
Each glass eyeball was carefully cleaned. A detergent designed specifically for cleaning glass was used for this process. Handling the eyeballs safely was a major concern and we ended up using foam tubes to make little doughnuts for the glass balls to sit in. The foam was held in place with toothpicks, so their creation and adjustment was relatively quick. During the cleaning we identified some additional cracks in the glass eyeballs that hadn’t been obvious until they were wet up. This step was very satisfying as the eyeballs went from dull and cloudy to glistening after cleaning.
Repairing of Glass Eyeballs
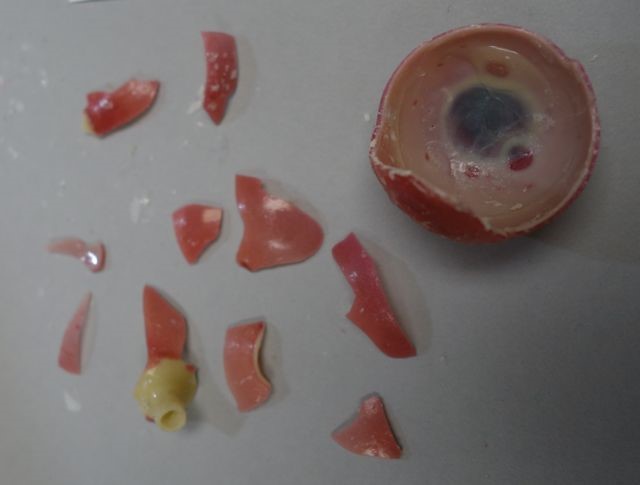
Before the eyeballs could be repaired, those with unsightly or failing old repairs had to be undone. The method varied depending on the types of repair materials previously used. Several of the repairs had been done with red wax. The wax remained soft and sticky making it messy and it did not closely resemble glass. The wax material was removed by gently warming it. Some of the other old adhesives had failed after becoming brittle. The brittle material could be brushed from the surfaces, with special care taken to not scratch the glass. Other old repair materials were removed with solvents.
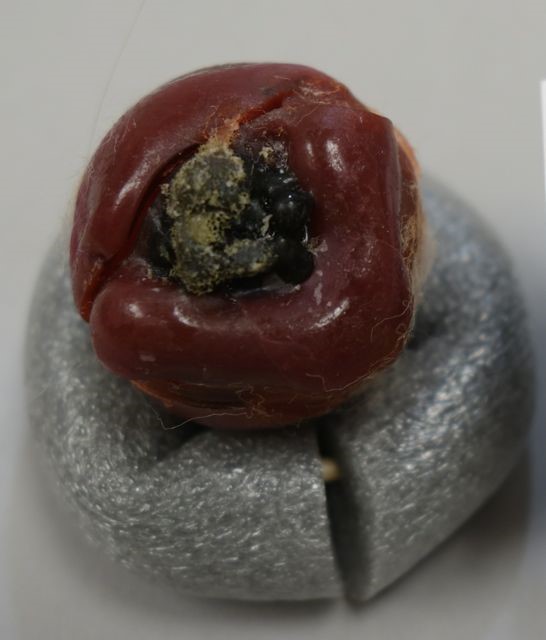
Old repair with red wax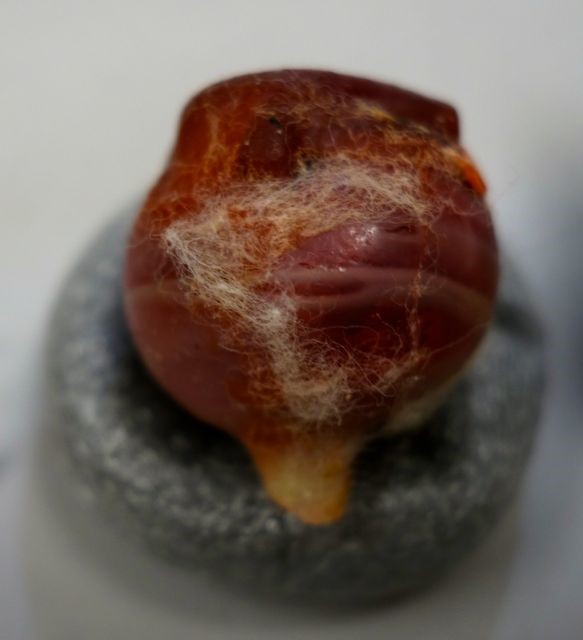
Old repair with red wax 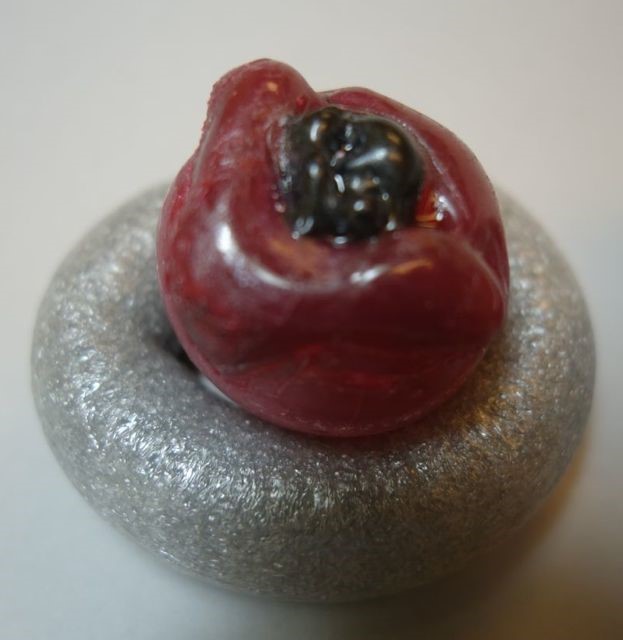
Old repair undone and redone with improved materials and techniques
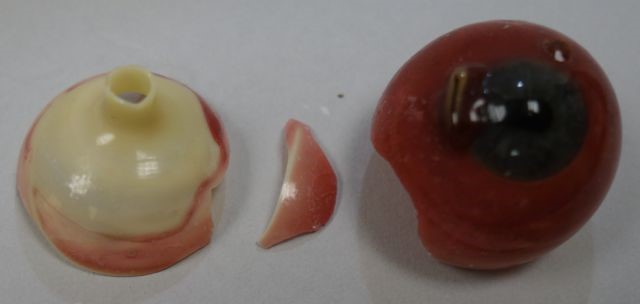
Old repair with pieces misaligned 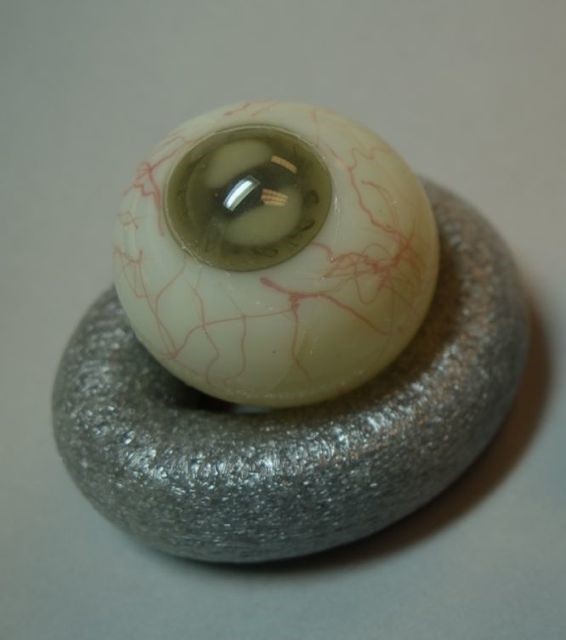
Disassembled and repaired in proper alignment
Repairing the individual eyeballs was the most challenging part of the process, as they are thin and delicate. Added to that, the high-grade epoxy that was designed for glass conservation can take several days to fully set. While this can be advantageous, as it allows adjustment of pieces, it also means the fine shards have to be held in place for long periods of time while the resin sets. An advantage of this epoxy is that it is very thin and can be fed by capillary action into cracks. That property was useful for many of the eyeballs. Also this adhesive has the added advantage of being far superior to commercially available epoxy resins in terms of long-term stability and greater light-stability, therefore it does not yellow like commercially available epoxies.
Before treatment 
After cleaning and gluing
Before treatment 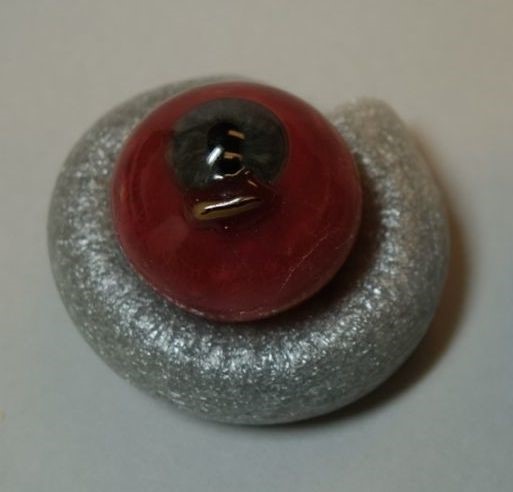
After cleaning and gluing
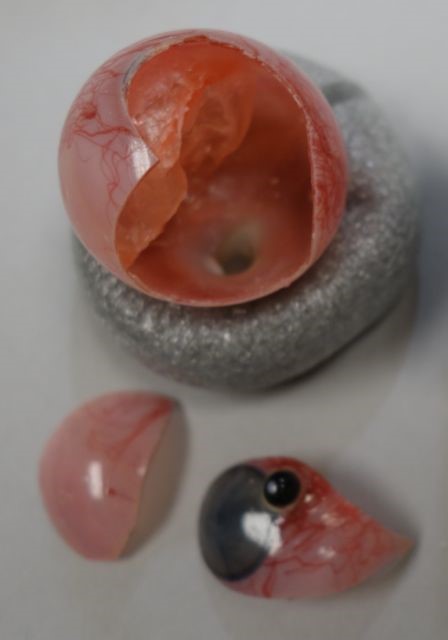
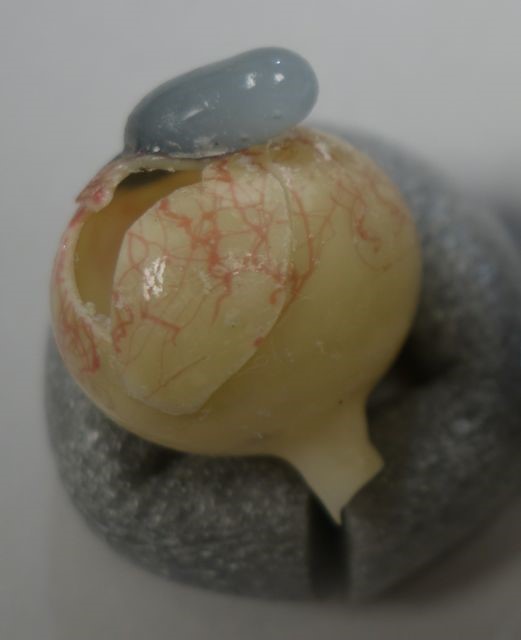
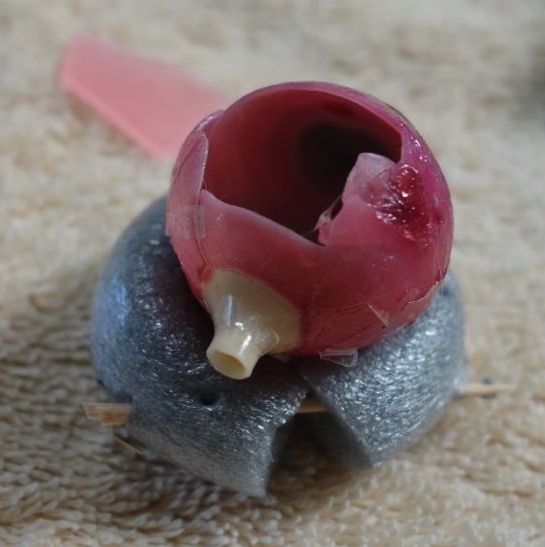
Once the eyeballs were repaired, a few had areas where the fragments of the glass were still missing. Glass eyeballs that were incomplete were filled with tinted thermoplastic resin mixtures and details such as veins, were inpainted (inpainting is the process of restoring lost or deteriorated surface decoration or details on an artwork) with commercially ground pigments in acrylic resin.
Before treatment, misaligned and losses 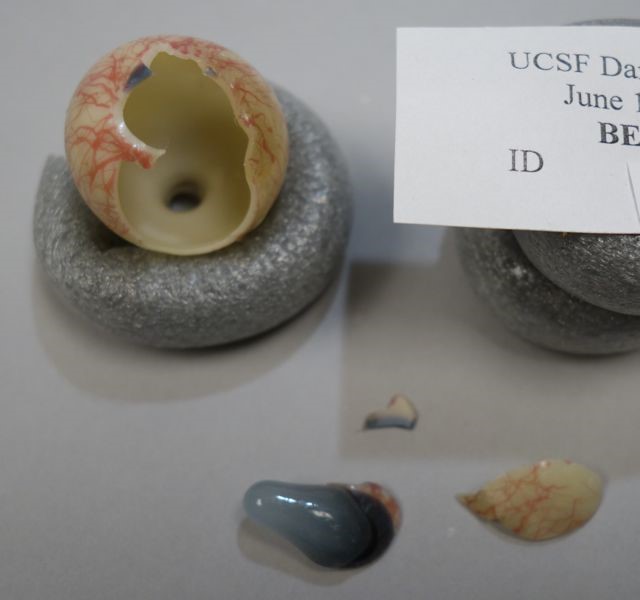
Old repairs undone 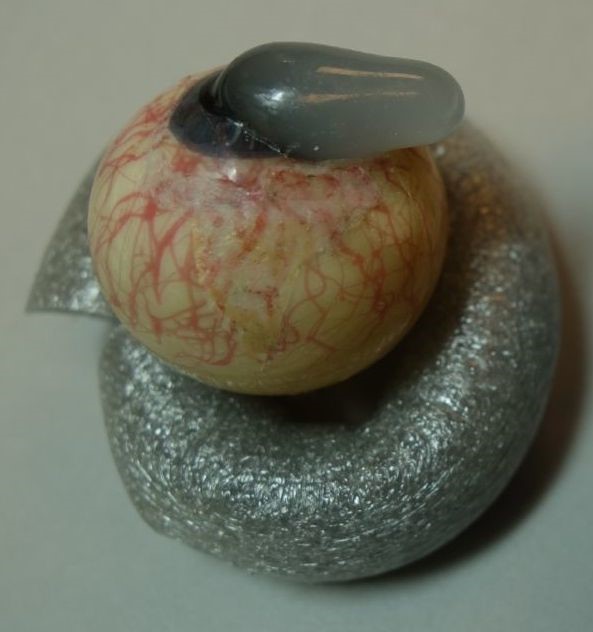
Treatment completed with pieces glued together and area of loss filled and veins inpainted on the fill
Eyeball before treatment, in pieces but with some old repairs still intact 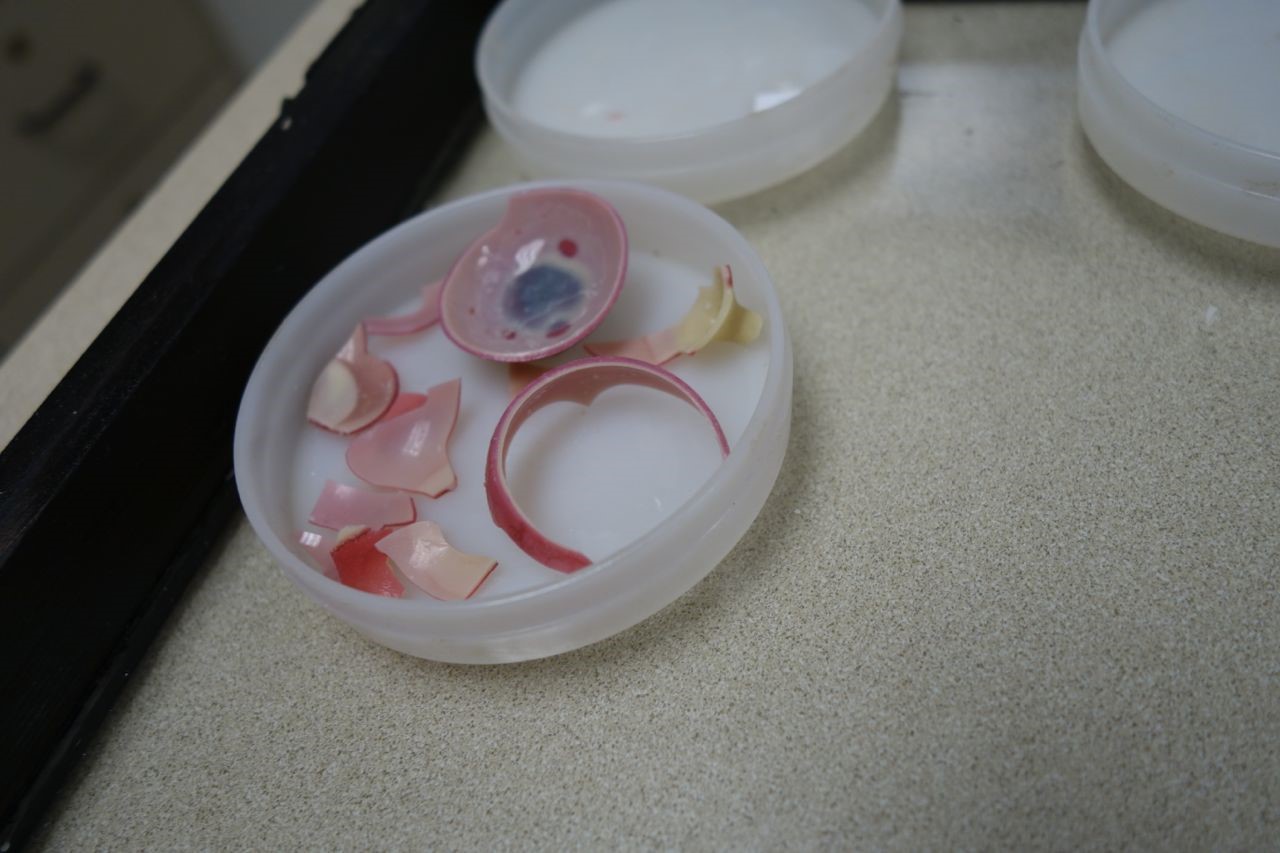
After removing old repairs
Pieces glued together and held with tape. Area of loss remained 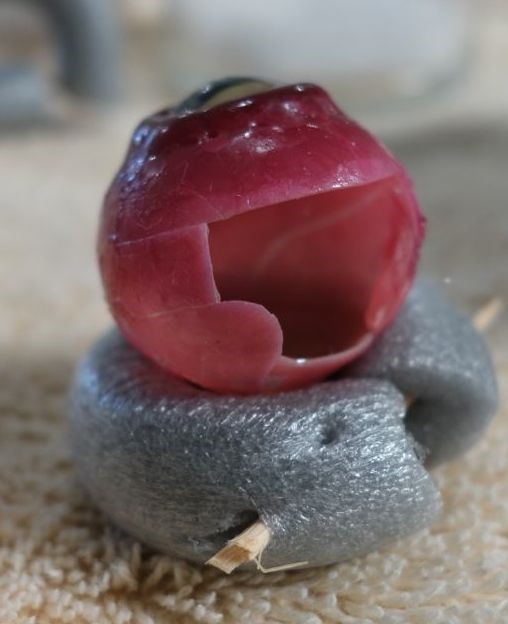
Area of loss after gluing all pieces together

After repair, glued together and area of loss filled with tinted resin mixture 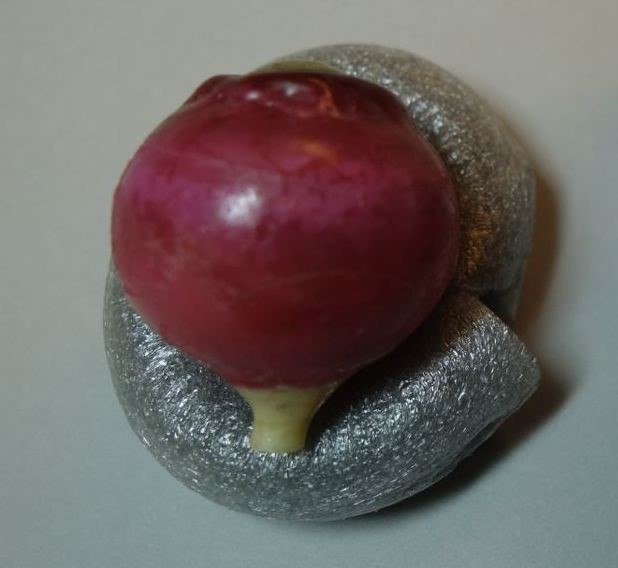
After repair showing area that was filled
The glass eyeballs were incredible to work on. They were beautifully made, if often difficult to look at. Only one of the eyeballs examined was failing due to unstable glass, or a poor match between the cream under layer and the colored surface glass. The glass blower had incredible mastery in working with glass in addition to skill in depicting the defects and conditions. We hope that after this conservation project the glass eyeballs continue to illustrate medical conditions and inspire awe for years to come.
After treatment 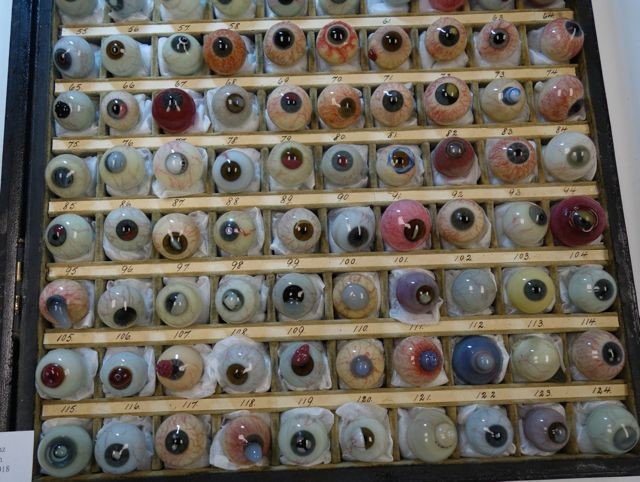
After treatment